Why You'll Love It
- - The contrast of crunchy batter and soft cookie center
- - No special equipment needed, just a pot and oil
- - Quick preparation makes it perfect for last‑minute gatherings
- - Fun to make with kids, watching the sizzle is a treat
*“These deep fried Oreos are addictive—crispy outside, warm and soft inside, just perfect for movie night!”*
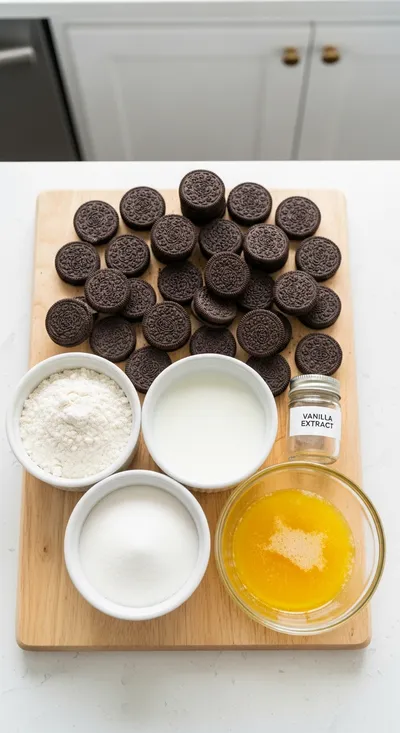
Essential Ingredient Guide
- Oreos: Choose classic chocolate‑cream Oreos for the most nostalgic flavor; store‑bought works fine.
- All‑purpose flour: Provides the structure for a light, crispy coating; sift for best results.
- Milk: Creates a smooth batter; whole milk adds a subtle richness.
- Vanilla extract: Enhances the sweet aroma and deepens the flavor of the batter.
- Lemon juice: A splash of acidity brightens the batter and helps it crisp.
- Sugar: A tiny pinch adds a caramelized finish to the outer crust.
Complete Cooking Process
-
Ingredient Readiness:
Separate the Oreos, whisk the flour, milk, vanilla, lemon juice, and sugar into a smooth batter.
-
Flavor Development:
Let the batter rest for a minute; the flour hydrates, creating a tender coating.
-
Texture Control:
Heat oil to 350°F, then fry a single Oreo to test; adjust temperature if the batter browns too fast.
-
Finishing Touches:
Drain the fried Oreos on paper towels, sprinkle lightly with powdered sugar.
-
Serving Timing:
Serve while still warm for the perfect contrast of crisp exterior and soft interior.
- Keep oil temperature steady; use a thermometer if possible.
- Do not overcrowd the pan – fry in batches for even crispness.
- Pat dry the Oreos before battering to prevent splatter.
- Add a pinch of salt to the batter for balanced sweetness.
Pro Tips
Well, those little tricks make a big difference. I remember the first time I tried this, the kitchen smelled like carnival fairs, and the kids couldn't wait. So, take your time, enjoy the process, and let the simple joy of deep frying turn a snack into a memory.
The essence of the dish:
A fun fact or historical angle:
Flavor or sensory focus:
You Must Know
- Work quickly – the batter can thicken as it sits
- Use a deep pot for safety and even heat
- Powdered sugar adds a finishing touch without overwhelming
Frequently Asked Questions
→ Can I use a different cookie?
Yes, try sandwich cookies like vanilla wafers or even pretzel sticks for a salty twist.
→ What oil is best?
A neutral oil with a high smoke point, such as canola or peanut oil, works best.
→ Do I need to freeze the Oreos first?
Freezing isn’t required, but a quick chill for 10 minutes can help the batter adhere.
→ How long should I fry each Oreo?
About 30–45 seconds, until the batter turns golden‑brown.
→ Can I make this ahead of time?
Fry them just before serving; they lose crispness if left out too long.
→ What can I serve them with?
A side of warm chocolate sauce, caramel drizzle, or a scoop of vanilla ice cream pairs beautifully.
Chef's Tips
Work quickly; the batter thickens as it sits.,For extra crunch, double‑dip the Oreos after the first fry.,Experiment with cinnamon in the batter for a warm spice note.
Nutrition Facts
per serving
280
Calories
3g
Protein
30g
Carbs
15g
Fat
Taste Profile
A sweet, buttery crunch with a warm, creamy center.
Ingredient Substitutions
Don't have an ingredient? Try these alternatives
May need a little extra milk to achieve the same batter consistency.
Adds a faint coconut aroma; keep temperature steady to avoid smoking.
Recipe Variations
Try these delicious twists on the original
Spicy Version
Add a pinch of cayenne pepper to the batter for a subtle heat that balances the sweetness.
Mediterranean Style
Mix a touch of ground cardamom and drizzle with honey after frying for a fragrant twist.
Common Mistakes to Avoid
Learn from others' mistakes for perfect results
- Overcrowding the pan, which drops oil temperature and yields soggy coating.
- Using batter that’s too thick, leading to a doughy exterior.
- Skipping the powder sugar dust, leaving the flavor flat.
Meal Prep & Storage
Make Ahead Tips
You can whisk the batter up to 12 hours ahead and keep it covered in the fridge; bring to room temperature before frying.
Leftover Ideas
Reheat gently in a 300°F oven for 5 minutes to restore crispness; they’re best enjoyed fresh.
Perfect Pairings
Serve this with...
Cooking Timeline
Prepare batter and heat oil; ensure oil reaches 350°F.
Dip Oreos, fry in batches, turning once for even color.
Remove, drain, and dust with powdered sugar.
Serve immediately while warm and crisp.
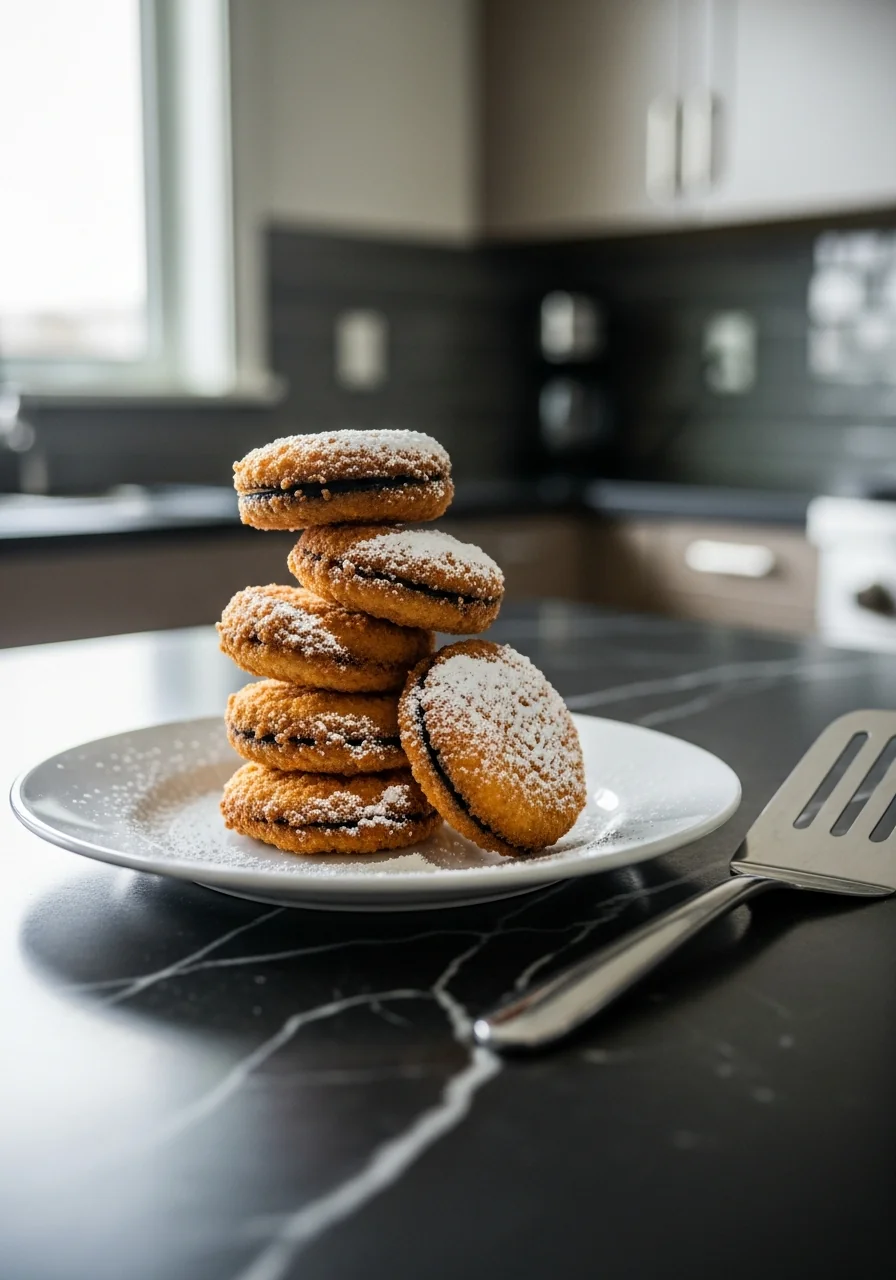
Deep Fried Oreos – Quick Sweet Treat
Crispy, golden deep fried oreos are the ultimate sweet bite—quick to make, delightfully crunchy, and perfect for sharing.
Timing
Prep Time
10 Minutes
Cook Time
15 Minutes
Total Time
25 Minutes
Recipe Details
Ingredients
Main Ingredients
- 01 12 Oreo cookies, classic chocolate‑cream
- 02 1 cup all‑purpose flour
- 03 1 cup whole milk
- 04 1 tsp vanilla extract
- 05 1 tbsp lemon juice
- 06 2 tbsp granulated sugar
- 07 Vegetable oil for deep‑frying
Instructions
In a bowl, whisk together flour, milk, vanilla, lemon juice, and sugar until smooth; the batter should be a bit thick.
Heat oil in a deep pot to 350°F (180°C). Test the temperature with a drop of batter – it should sizzle and rise to the surface.
Dip each Oreo into the batter, allowing excess to drip off, then carefully lower into the hot oil.
Fry for 30–45 seconds, turning once, until the coating is golden and crisp. Remove with a slotted spoon and drain on paper towels.
Dust generously with powdered sugar while still warm; serve immediately.
Notes & Tips
- 1 Work quickly; the batter thickens as it sits.
- 2 For extra crunch, double‑dip the Oreos after the first fry.
- 3 Experiment with cinnamon in the batter for a warm spice note.
Tools You'll Need
-
Deep pot or fryer
-
Thermometer
-
Slotted spoon
-
Mixing bowl
-
Whisk
-
Paper towels
Must-Know Tips
- Don't overcrowd the pan, Cook in batches to keep oil temperature steady.
- Pat oreos dry, Allows batter to adhere without splatter.
- Taste as you go, Adjust seasoning with a pinch of salt if needed.
Professional Secrets
- Room temperature batter, Ensures even coating.
- Maintain consistent oil heat, Creates uniform crispness.
- Drain on layered paper towels, Removes excess oil quickly.

Recipe by
AmeliaAmelia is a seasoned food blogger and recipe creator at CookDishWorld, where she blends culinary expertise with an unwavering love for sharing delicio ...
Get Delicious Recipes Weekly
Join 25,000+ home cooks getting our best recipes straight to their inbox.
Free forever • No spam • Unsubscribe anytime