Why You'll Love It
- - The crust is buttery yet light, melting in your mouth.
- - Lemon filling offers a bright, refreshing tang.
- - Perfect for picnics, tea parties, or a quiet evening snack.
- - Easy to freeze and reheat without losing texture.
*"These hand pies are simply delightful—perfectly tart and buttery. My family can’t get enough!"*
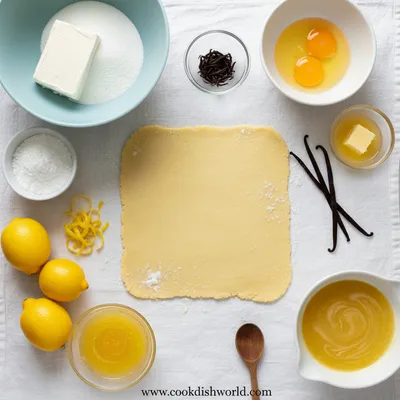
Essential Ingredient Guide
- Lemon zest and juice: Provides the signature bright flavor; use fresh lemons for best aroma.
- Cream cheese: Choose full‑fat for a creamy, stable filling that sets well.
- All‑purpose flour: Creates the buttery crust; sift for a lighter texture.
- Granulated sugar: Balances the tartness; adjust slightly if you prefer less sweetness.
- Lemon curd (optional): Adds an extra layer of citrus depth if you like extra zing.
- Vanilla extract: Subtle warmth that rounds out the bright lemon notes.
Complete Cooking Process
-
Ingredient Readiness:
Measure flour, chill butter, zest lemons, and soften cream cheese before you begin.
-
Flavor Development:
Combine lemon zest with butter for the crust, and fold lemon juice into the cheese mixture for the filling.
-
Texture Control:
Avoid over‑mixing the dough; it should be crumbly, not sticky. Bake until edges are lightly golden.
-
Finishing Touches:
Dust each hand pie with powdered sugar and let the filling set before serving.
-
Serving Timing:
Serve slightly warm or at room temperature for the best balance of crust crunch and creamy filling.
- Chill the dough for 15 minutes before rolling to prevent shrinkage.
- Use a light hand when sealing edges to keep the filling from leaking.
- Brush tops with a simple egg wash for a glossy finish.
Pro Tips
Well, these little tricks make a big difference. The dough stays tender, the seal stays tight, and the pies look inviting on the plate. I often enjoy them with a fresh pot of Earl Grey, letting the tea’s subtle bergamot echo the lemon’s brightness. It’s a quiet ritual that turns an ordinary snack into a moment of calm.
The essence of the dish:
A fun fact or historical angle:
Flavor or sensory focus:
You Must Know
- Cool the crust before filling to keep the shape.
- Set the pies in the fridge for at least an hour to firm the filling.
- Dust with powdered sugar just before serving for extra sparkle.
Frequently Asked Questions
→ Can I use a gluten‑free crust?
Yes, substitute the all‑purpose flour with a 1:1 gluten‑free flour blend and add a touch more butter to help bind.
→ How long can the hand pies be stored?
Refrigerated, they stay fresh for up to 3 days. Freeze for up to a month; reheat gently in a low oven.
→ What if I don’t have fresh lemons?
You can use bottled lemon juice for the filling, but reserve fresh zest for the crust to retain bright aroma.
→ Can I add berries to the filling?
Absolutely—swirl in a spoonful of raspberry or blueberry compote for a fruity twist.
→ Do the pies need to be baked twice?
No, they bake once—first for the crust, then the filling sets as it cools.
→ What’s a good serving suggestion?
Serve alongside a dollop of lightly sweetened whipped cream or a drizzle of honey.
Chef's Tips
If the crust shrinks, chill it a bit longer before rolling.,Do not over‑mix the filling; excess air can cause cracks.,For a glossy finish, brush tops with a light egg wash before the second bake.
Nutrition Facts
per serving
210
Calories
4g
Protein
20g
Carbs
12g
Fat
Taste Profile
A bright, tangy sweetness balanced by buttery richness.
Ingredient Substitutions
Don't have an ingredient? Try these alternatives
Adjust sugar slightly; Greek yogurt adds a tangy note.
Will give a nutty flavor and softer crust; may need extra butter.
Recipe Variations
Try these delicious twists on the original
Spicy Version
Add a pinch of cayenne pepper to the crust and a thin swirl of orange marmalade on top for a subtle kick.
Mediterranean Style
Incorporate a pinch of thyme into the crust and garnish with toasted pistachios after cooling.
Common Mistakes to Avoid
Learn from others' mistakes for perfect results
- Over‑mixing the dough, leading to a tough crust.
- Filling pies before the crust is fully cooled, causing sogginess.
- Baking too long, which can dry out the cheesecake filling.
Meal Prep & Storage
Make Ahead Tips
The crust can be prepared and frozen up to 2 days ahead. Thaw, bake, and add the filling when ready for a quick assembly.
Leftover Ideas
Reheat gently in a low oven (300°F) for 5‑7 minutes, or enjoy cold straight from the fridge.
Perfect Pairings
Serve this with...
Cooking Timeline
Prepare crust ingredients, mix, chill dough.
Roll dough, cut circles, press into tins, bake crust.
Blend filling ingredients until smooth.
Fill baked crusts, bake again until set.
Cool, refrigerate, and dust with powdered sugar.
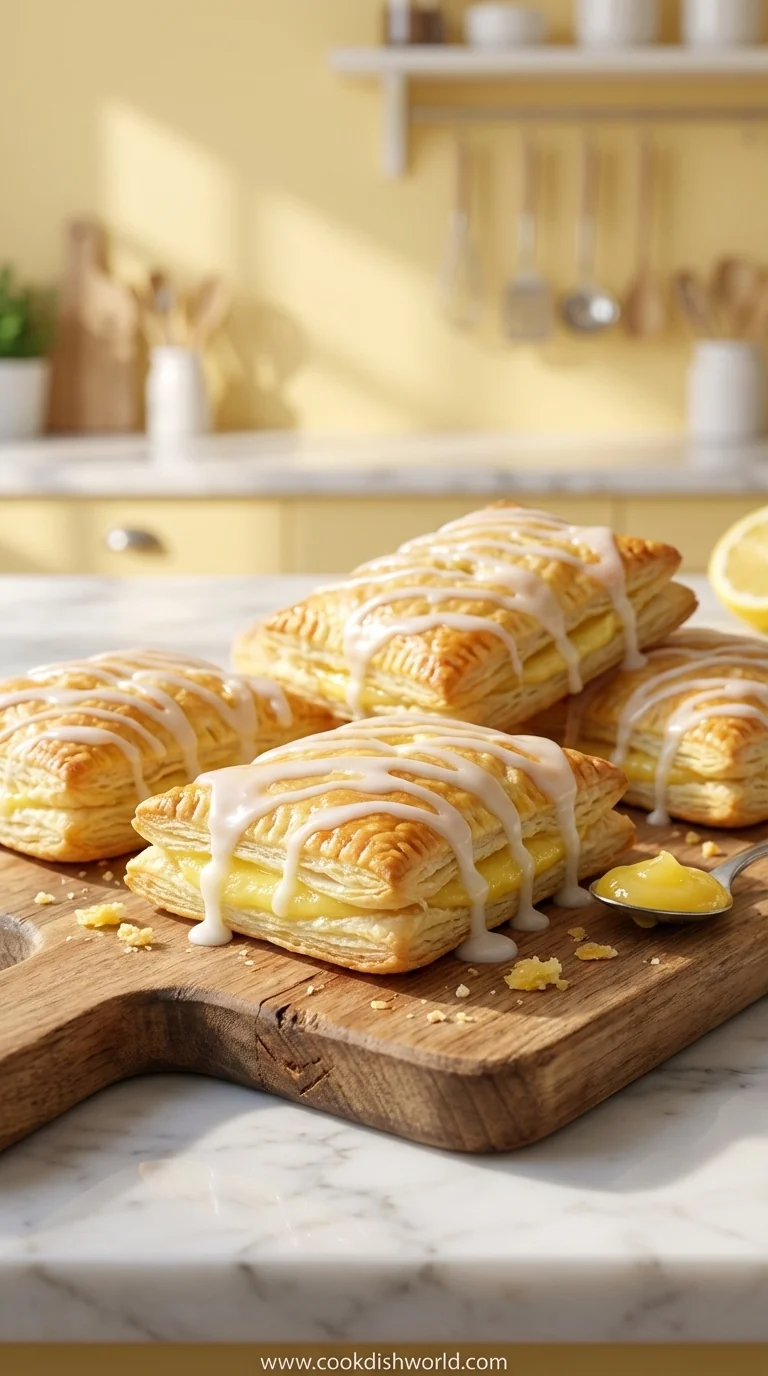
Lemon Cheesecake Hand Pies
These bright lemon cheesecake hand pies combine a buttery, golden crust with a silky lemon‑infused filling, making each bite a sunshine moment. Pair them with a cup of tea for an easy afternoon delight. Discover more sweet ideas in our soft chewy collection.
Timing
Prep Time
20 Minutes
Cook Time
25 Minutes
Total Time
45 Minutes
Recipe Details
Ingredients
Crust
- 01 2 cups all‑purpose flour
- 02 1/2 cup unsalted butter, cold and cubed
- 03 1/4 cup granulated sugar
- 04 1 tbsp lemon zest
- 05 1‑2 tbsp ice‑cold water
Filling
- 01 8 oz cream cheese, softened
- 02 1/3 cup granulated sugar
- 03 2 large eggs
- 04 1/4 cup fresh lemon juice
- 05 1 tsp vanilla extract
Instructions
In a bowl, combine flour, sugar, and lemon zest; cut in the cold butter until the mixture resembles coarse crumbs.
Add ice‑cold water a tablespoon at a time, knead gently to form a dough, then wrap and chill for 15 minutes.
Roll the dough on a lightly floured surface, cut into 4‑inch circles, and place them in mini muffin tins, pressing lightly to form cups.
Bake the crusts at 350°F for 10‑12 minutes, until the edges are lightly golden. Let cool while you prepare the filling.
Beat cream cheese and sugar until smooth, then add eggs one at a time, followed by lemon juice and vanilla; mix just until combined.
spoon the cheesecake mixture into the pre‑baked crusts, filling each about three‑quarters full.
Bake again for 12‑15 minutes, until the centers are set but still slightly wobbly.
Cool the pies in the tin for 10 minutes, then transfer to a wire rack. Refrigerate for at least 1 hour before serving.
Notes & Tips
- 1 If the crust shrinks, chill it a bit longer before rolling.
- 2 Do not over‑mix the filling; excess air can cause cracks.
- 3 For a glossy finish, brush tops with a light egg wash before the second bake.
Tools You'll Need
-
Mixing bowls
-
Hand mixer or whisk
-
Rolling pin
-
Mini muffin tin
-
Pastry brush
-
Cooling rack
Must-Know Tips
- Keep butter cold to ensure a flaky crust.
- Use a light hand when sealing edges to avoid leaking.
- Let the pies chill fully for the best texture.
Professional Secrets
- Brush the crust with melted butter before baking for extra richness.
- Add a pinch of cream of tartar to the egg whites for stability.
- Use parchment paper circles in the tin to prevent sticking.

Recipe by
AmeliaAmelia is a seasoned food blogger and recipe creator at CookDishWorld, where she blends culinary expertise with an unwavering love for sharing delicio ...
Get Delicious Recipes Weekly
Join 25,000+ home cooks getting our best recipes straight to their inbox.
Free forever • No spam • Unsubscribe anytime