Why You'll Love It
- - No oven required, perfect for summer evenings
- - Quick prep, under 15 minutes from start to finish
- - Fudgy texture that melts on the tongue
- - Stores well for a stash of sweet moments
*These little bites are pure comfort, melting away stress in seconds.*
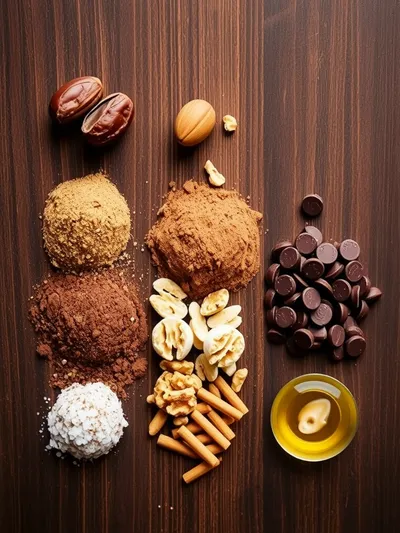
Essential Ingredient Guide
- Dark chocolate: Choose a good quality 70% chocolate; it gives depth and a less sugary finish.
- Unsalted butter: Provides a glossy sheen and silkiness; use room‑temperature butter for easy mixing.
- Powdered sugar: Adds sweetness without gritty texture; sift to avoid lumps.
- Cocoa powder: Boosts chocolate intensity; use Dutch‑process for a smoother flavor.
- Vanilla extract: A tiny splash brightens the chocolate and rounds the taste.
- Sea salt: Just a pinch enhances the sweet‑bitter balance.
Complete Cooking Process
-
Ingredient Readiness:
Measure and warm the butter; break chocolate into small pieces for even melting.
-
Flavor Development:
Melt butter and chocolate together, then stir in sugar, cocoa, and vanilla; the aroma deepens.
-
Texture Control:
Cool the batter slightly before rolling, ensuring the mixture holds its shape.
-
Finishing Touches:
Dust each bite with a pinch of sea salt and optional cocoa powder for a polished look.
-
Serving Timing:
Let the bites set in the refrigerator for at least 20 minutes; serve chilled or at room temperature.
- Use parchment paper to prevent sticking when shaping
- If chocolate is too thick, add a splash of milk for smoother flow
- Press the batter firmly in the mold for uniform bites
- Store in an airtight container to keep the fudgy texture
Pro Tips
Well, these little secrets make the whole process feel almost like a ritual, a calm pause in a busy day. You’ll notice the difference in texture and shine when you take that first bite. And honestly, the fragrance that fills the kitchen is a gentle reminder of why we love simple desserts. Ugh, I remember the first time I tried a no‑bake treat—it was a spontaneous decision on a hot afternoon, and the result was a surprise burst of satisfaction. So, take your time, enjoy the quiet moments, and let the chocolate speak for itself.
The essence of the dish:
A fun fact or historical angle:
Flavor or sensory focus:
You Must Know
- Chocolate must be fully melted before shaping
- Do not over‑mix; stop once smooth
- Chill briefly for firm bites
Frequently Asked Questions
→ Can I use milk chocolate instead of dark?
Yes, but the flavor will be sweeter and less intense; you might reduce the powdered sugar a little.
→ How long can I store them?
Keep them in an airtight container in the fridge for up to five days; they stay fudgy.
→ Can I add nuts?
Chopped walnuts or pecans add a pleasant crunch; stir them in after the batter cools slightly.
→ Do I need a special mold?
No, a silicone mini‑muffin tray or even a lined ice‑cube tray works fine.
→ Can I freeze these bites?
Yes, freeze for up to two months; thaw gently at room temperature before serving.
→ Is this recipe gluten‑free?
Absolutely; there are no grain‑based ingredients, making it safe for gluten‑free diets.
Chef's Tips
If the chocolate thickens too quickly, add a teaspoon of neutral oil for a smoother texture.,For a richer flavor, let the batter rest a few minutes before shaping.,Serve at room temperature for the softest bite.
Nutrition Facts
per serving
120
Calories
2g
Protein
12g
Carbs
8g
Fat
Taste Profile
Rich chocolate with subtle sweetness
Ingredient Substitutions
Don't have an ingredient? Try these alternatives
Provides a slight coconut aroma; keep the mixture slightly cooler when mixing.
Use less sweetener; adjust to taste.
Recipe Variations
Try these delicious twists on the original
Spicy Version
Add a pinch of cayenne pepper and a dash of chili powder for a subtle heat.
Mediterranean Style
Fold in chopped dried apricots and a sprinkle of toasted pistachios for a nutty twist.
Common Mistakes to Avoid
Learn from others' mistakes for perfect results
- Overheating chocolate, causing it to seize.
- Skipping the cooling step, which makes shaping difficult.
- Using too much sugar, leading to a grainy texture.
Meal Prep & Storage
Make Ahead Tips
You can prepare the batter a day ahead and store it covered in the fridge; shape the bites when ready to serve.
Leftover Ideas
Reheat gently in a skillet over low heat for a few seconds if you prefer a softer texture.
Perfect Pairings
Serve this with...
Cooking Timeline
Gather and measure all ingredients; break chocolate, cube butter.
Melt chocolate and butter together using a double boiler.
Stir in sugar, cocoa, vanilla, and salt until smooth.
Cool slightly, then scoop onto parchment and shape bites.
Refrigerate to set, then store or serve.
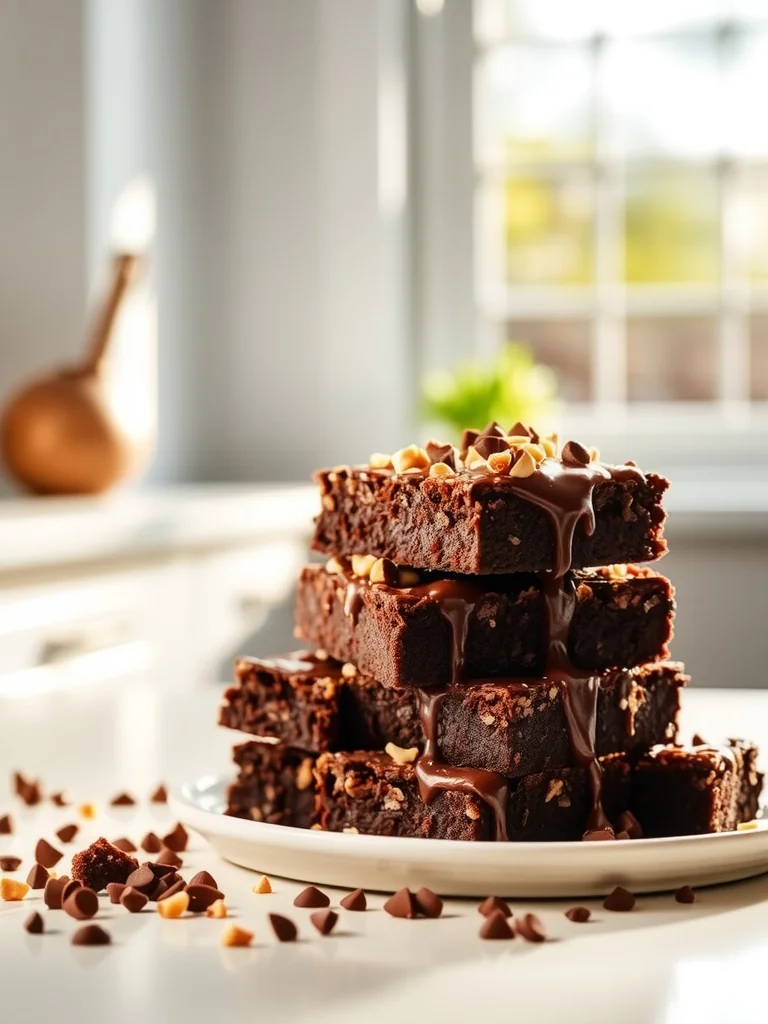
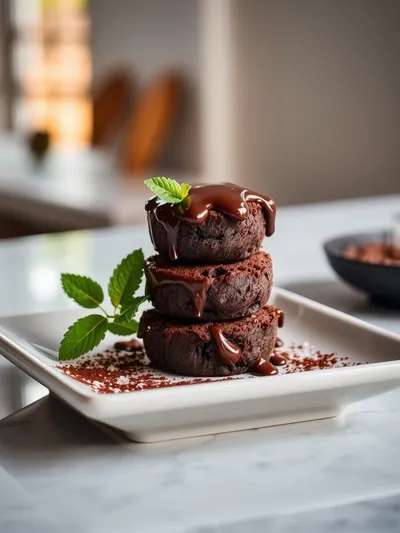
No-Bake Brownie Bites Recipe
Fudgy, chocolatey brownie bites that require no oven—quick, easy, and perfect for satisfying sweet cravings any time.
Timing
Prep Time
10 Minutes
Cook Time
0 Minutes
Total Time
30 Minutes
Recipe Details
Ingredients
Main Ingredients
- 01 1 cup dark chocolate (70% cacao), chopped
- 02 1/4 cup unsalted butter
- 03 1/3 cup powdered sugar
- 04 2 tbsp cocoa powder
- 05 1 tsp vanilla extract
- 06 Pinch of sea salt
Optional Toppings
- 01 Cocoa powder for dusting
- 02 Crushed toasted almonds
- 03 A drizzle of melted white chocolate
Instructions
In a heat‑proof bowl, combine the chocolate and butter; melt gently over a pot of simmering water, stirring until glossy.
Remove from heat and whisk in powdered sugar, cocoa powder, vanilla, and sea salt until the mixture is smooth and slightly thick.
Let the mixture cool for about 5 minutes, then spoon small portions onto a parchment‑lined tray, shaping each into bite‑size rounds.
Optionally dust with cocoa powder or add a light topping; press gently to adhere.
Refrigerate the tray for at least 20 minutes until the bites are firm, then transfer to an airtight container.
Notes & Tips
- 1 If the chocolate thickens too quickly, add a teaspoon of neutral oil for a smoother texture.
- 2 For a richer flavor, let the batter rest a few minutes before shaping.
- 3 Serve at room temperature for the softest bite.
Tools You'll Need
-
Heat‑proof bowl
-
Saucepan for double boiler
-
Whisk
-
Spoon or small ice‑cream scoop
-
Parchment paper
-
Refrigerated tray
Must-Know Tips
- Don't over‑heat the chocolate, it can seize.
- Work quickly after cooling; the mixture firms fast.
- Use parchment paper to keep bites from sticking.
Professional Secrets
- Use a double boiler to control heat, preventing burnt chocolate.
- Add a pinch of salt to enhance the chocolate’s depth.
- Sift cocoa powder to avoid gritty texture.

Recipe by
AmeliaAmelia is a seasoned food blogger and recipe creator at CookDishWorld, where she blends culinary expertise with an unwavering love for sharing delicio ...
Get Delicious Recipes Weekly
Join 25,000+ home cooks getting our best recipes straight to their inbox.
Free forever • No spam • Unsubscribe anytime