Why You'll Love It
- - Fresh orange juice gives a bright, natural flavor
- - No fancy equipment needed, just a blender
- - Creamy vanilla ice cream balances the citrus tartness
- - Perfect for hot days or a cozy night in
*"This milkshake took me right back to my childhood porch swing—pure comfort in a glass."*
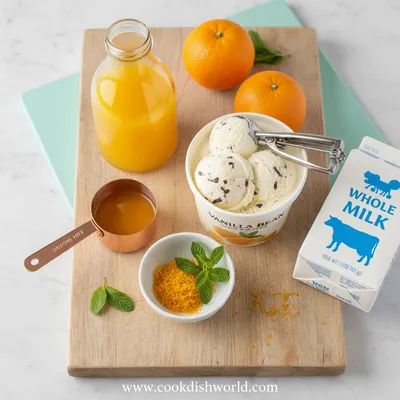
Essential Ingredient Guide
- Fresh orange juice: Choose a sweet, fully ripened orange; strain to remove pulp for a smoother texture.
- Vanilla ice cream: Use a high‑quality, custard‑based ice cream for richness; let it soften slightly before blending.
- Whole milk: Adds silkiness; you can swap for oat milk for a dairy‑free version.
- Vanilla extract: A dash deepens the vanilla undertone without overpowering the orange.
- Orange zest: Finely grated zest brightens the aroma and adds a subtle bite.
- Whipped cream (optional): Top the shake for extra indulgence and a fluffy finish.
Complete Cooking Process
-
Ingredient Readiness:
Gather fresh orange juice, vanilla ice cream, milk, and a splash of vanilla. Pat the orange peel for zest, then set everything at room temperature for even blending.
-
Flavor Development:
Blend orange juice with ice cream first; this creates a creamy base that carries the citrus through the shake.
-
Texture Control:
Add milk gradually while the blender runs; watch the consistency become silky smooth, not too runny.
-
Finishing Touches:
Stir in a pinch of zest, then drizzle a little vanilla extract. Top with whipped cream if you like.
-
Serving Timing:
Serve immediately in a chilled glass, garnish with a twist of orange zest for visual charm.
- Use freshly squeezed juice for the brightest flavor.
- Chill your glasses beforehand for extra refreshment.
- If the shake is too thick, add a splash more milk.
- Add a few ice cubes for a frostier texture on hot days.
Pro Tips
Well, these little adjustments can make a big difference. I’ve found that chilling the glass adds a subtle crispness that makes the first sip feel like a cool breeze on a summer porch. And remember, a touch of zest on top not only looks pretty but also lifts the whole flavor profile. Enjoy the moment, and let the milkshake bring a smile to your face.
The essence of the dish:
A fun fact or historical angle:
Flavor or sensory focus:
You Must Know
- Use freshly squeezed orange juice for true flavor.
- Don’t over‑blend; keep a gentle swirl.
- Serve cold for optimal refreshment.
Frequently Asked Questions
→ Can I use frozen orange juice?
Yes, but thaw it first; otherwise the shake may become icy instead of smooth.
→ What if I don’t have vanilla ice cream?
A good quality vanilla frozen yogurt works well, though the texture will be slightly tangier.
→ Is this recipe dairy‑free?
Swap the ice cream for a dairy‑free vanilla soft serve and use oat or almond milk.
→ How can I make it healthier?
Reduce the ice cream amount, add a banana for natural sweetness, and use low‑fat milk.
→ Can I add a boozy twist?
A splash of orange liqueur or a hint of vanilla vodka adds depth, but keep it modest.
→ What toppings work best?
Whipped cream, a drizzle of caramel, or toasted coconut flakes complement the flavors nicely.
Chef's Tips
If the shake is too thick, thin it with a splash more milk.,For an extra‑cold drink, chill the glasses and the blender jar beforehand.,Freshly grated zest adds aroma; avoid the white pith which can be bitter.
Nutrition Facts
per serving
280
Calories
5g
Protein
38g
Carbs
9g
Fat
Taste Profile
Bright citrus with creamy vanilla smoothness
Ingredient Substitutions
Don't have an ingredient? Try these alternatives
Provides a tangier note and fewer calories.
Gives a nutty undertone while staying dairy‑free.
Recipe Variations
Try these delicious twists on the original
Spicy Version
Add a pinch of cayenne pepper and a drizzle of honey for a sweet‑heat twist.
Tropical Twist
Swap half the orange juice for pineapple juice and garnish with toasted coconut.
Common Mistakes to Avoid
Learn from others' mistakes for perfect results
- Using bottled orange juice with artificial flavor.
- Blending too long, which can make the shake watery.
- Forgetting to chill the glasses.
Meal Prep & Storage
Make Ahead Tips
You can squeeze the orange juice a day ahead and keep it refrigerated; blend with ice cream just before serving.
Leftover Ideas
Re‑blend any leftover shake with a splash of milk for a quick refreeze.
Perfect Pairings
Serve this with...
Cooking Timeline
Gather and prep ingredients – juice oranges, grate zest.
Blend orange juice, ice cream, milk, and vanilla until smooth.
Taste, adjust flavor, and add zest.
Pour into chilled glasses, garnish, and serve.
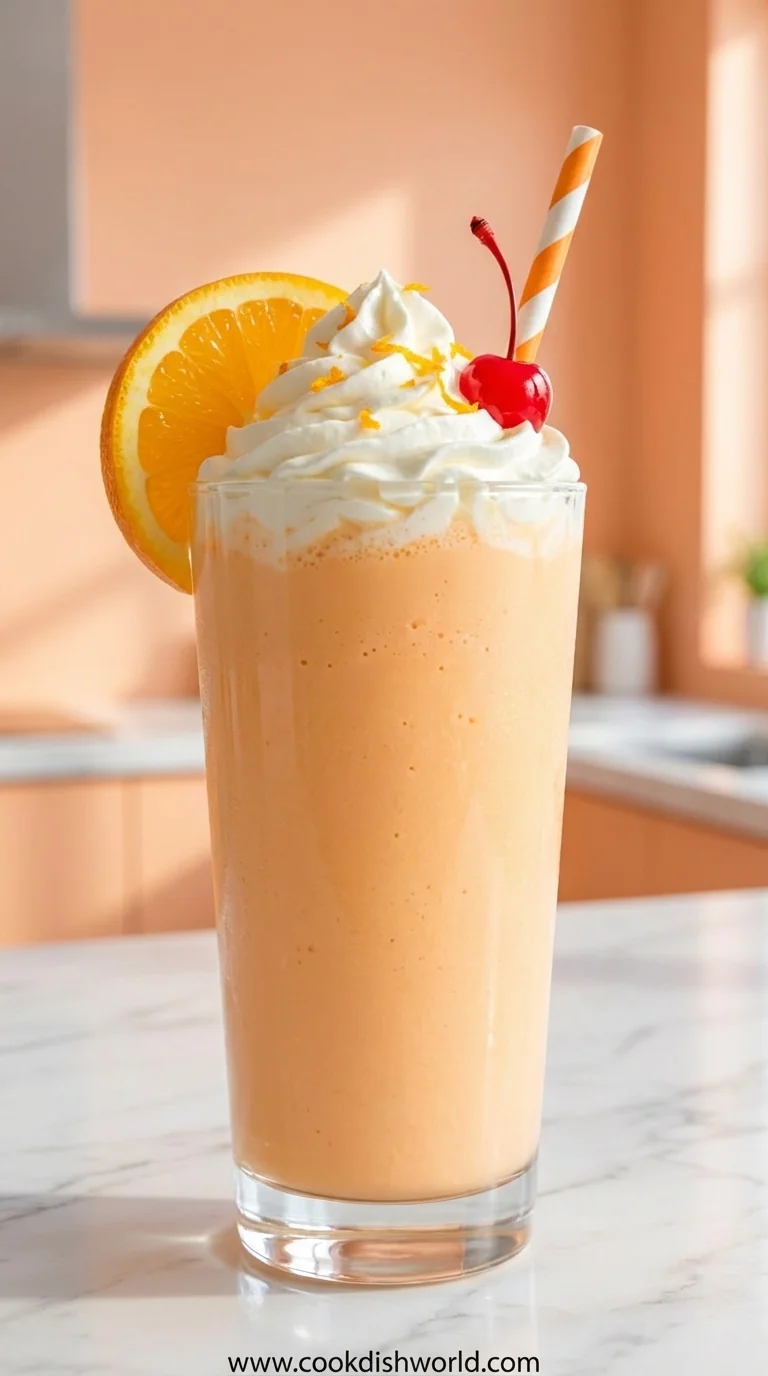
Orange Creamsicle Milkshake
A silky orange creamsicle milkshake that feels like a sunny afternoon in a glass, blending bright citrus with sweet vanilla for a nostalgic treat that comforts the soul.
Timing
Prep Time
10 Minutes
Cook Time
0 Minutes
Total Time
10 Minutes
Recipe Details
Ingredients
Main Ingredients
- 01 1 cup fresh orange juice
- 02 2 cups vanilla ice cream
- 03 ½ cup whole milk
- 04 1 tsp vanilla extract
- 05 1 tsp orange zest
Optional Garnish
- 01 Whipped cream
- 02 Extra orange zest
- 03 A drizzle of honey
Instructions
Pour the orange juice into the blender, then add the vanilla ice cream. I mean, start slow so the ice cream doesn’t splash out.
Add the milk and vanilla extract. Blend on medium‑high until the mixture is smooth and has a soft swirl.
Taste and adjust – if you prefer a stronger orange punch, add a little more juice or zest.
Pour into chilled glasses, top with whipped cream and a sprinkle of orange zest. Serve immediately.
Notes & Tips
- 1 If the shake is too thick, thin it with a splash more milk.
- 2 For an extra‑cold drink, chill the glasses and the blender jar beforehand.
- 3 Freshly grated zest adds aroma; avoid the white pith which can be bitter.
Tools You'll Need
-
Blender
-
Measuring cups
-
Zester or microplane
-
Chilled glasses
-
Spatula
Must-Know Tips
- Don’t over‑blend; keep a gentle swirl for texture.
- Use fresh juice for brightest flavor.
- Chill glasses for an extra refreshing sip.
Professional Secrets
- Room temperature ice cream blends more evenly.
- Add milk gradually to control thickness.
- Finish with zest for an aroma boost.

Recipe by
AmeliaAmelia is a seasoned food blogger and recipe creator at CookDishWorld, where she blends culinary expertise with an unwavering love for sharing delicio ...
Get Delicious Recipes Weekly
Join 25,000+ home cooks getting our best recipes straight to their inbox.
Free forever • No spam • Unsubscribe anytime