Why You'll Love It
- - Only five everyday ingredients
- - No mixing bowls, just dump and bake
- - Warm chocolate aroma fills the kitchen
- - Perfect for last‑minute gatherings
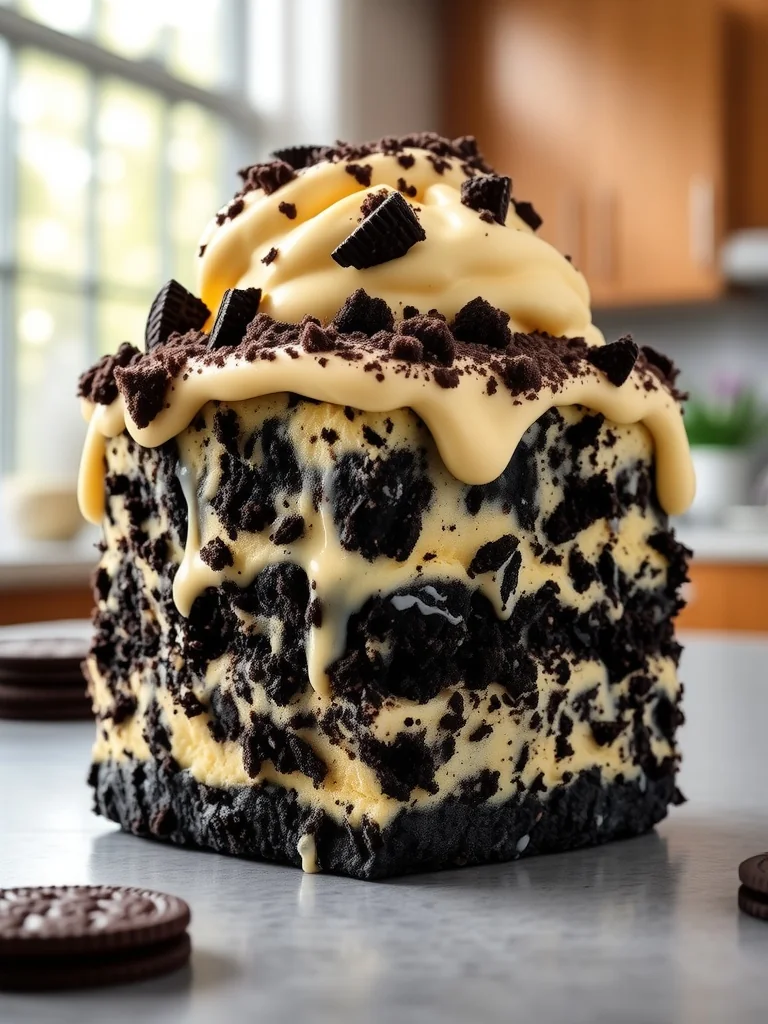
Absolutely the easiest dessert I've ever made—chewy, chocolatey, and ready in minutes.
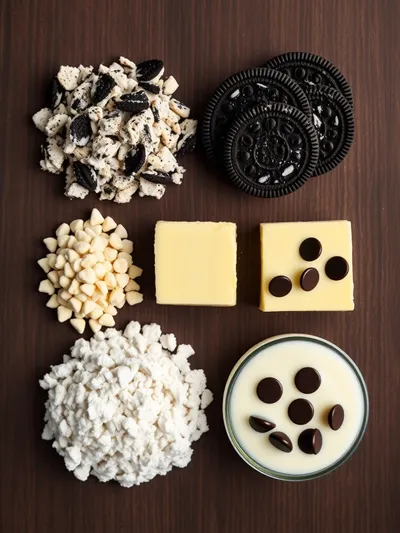
Essential Ingredient Guide
- Oreo cookies: Use full‑size cookies; they provide the chocolatey crunch and a buttery base. Slightly crush them for even layers.
- Unsalted butter: Melted butter gives richness and helps the cookies melt into a soft crust.
- Cream cheese: Adds a subtle tang and a silky texture that balances the sweet cookies.
- Sugar: Granulated sugar sweetens the batter without overwhelming the Oreo flavor.
- Vanilla extract: A dash of vanilla lifts the flavor, adding depth to the chocolate profile.
- Whipped topping (optional): Serve a dollop on each slice for extra fluffiness and a cool contrast.
Complete Cooking Process
-
Ingredient Readiness:
Gather all items, melt the butter, and let the cream cheese soften at room temperature.
-
Flavor Development:
The butter melds with the crushed Oreo pieces, creating a caramelized base as the cake bakes.
-
Texture Control:
Mix the batter gently; over‑mixing can make the crumb too dense. The oven's steam keeps the interior moist.
-
Finishing Touches:
Cool the cake slightly before topping with whipped topping or a drizzle of melted chocolate.
-
Serving Timing:
Serve warm, when the center is still soft; it solidifies a bit as it rests.
- Use melted butter, not melted and cooled, for a glossy crust.
- Spread the cookie crumbs evenly to avoid soggy spots.
- Let the cake rest 5 minutes after baking for easier slicing.
- Add a pinch of sea salt on top for contrast.
Pro Tips
Well, those little tweaks make a big difference. I remember the first time I let the cake sit just a moment—yeah, the slice stayed together and the crumb stayed tender. So, take that pause, enjoy the aroma, and serve with confidence.
The essence of the dish:
A fun fact or historical angle:
Flavor or sensory focus:
You Must Know
- Do not over‑bake; the center stays soft.
- A light dusting of cocoa adds visual depth.
- Serve warm for the best texture.
Frequently Asked Questions
→ Can I make this cake gluten‑free?
Yes, swap regular Oreos for a certified gluten‑free chocolate sandwich cookie; the rest of the recipe stays the same.
→ How long does it keep in the fridge?
Store covered for up to three days; reheat gently in the microwave or oven before serving.
→ Can I add a fruit topping?
Absolutely—fresh berries add a bright tartness that balances the sweetness.
→ Is this suitable for vegans?
Use plant‑based butter, dairy‑free cream cheese, and vegan whipped topping to make it fully vegan.
→ What’s the best serving size?
A 2‑inch square slice provides a satisfying portion without being overwhelming.
→ Can I freeze leftovers?
Yes, wrap tightly and freeze for up to two months; thaw in the refrigerator before reheating.
Chef's Tips
If you prefer a richer flavor, add a tablespoon of cocoa powder to the batter.,For a crunchier top, sprinkle additional crushed Oreos before baking.,The cake can be made ahead; just reheat before serving for best texture.
Nutrition Facts
per serving
420
Calories
6g
Protein
42g
Carbs
24g
Fat
Taste Profile
Chocolatey, buttery, and sweet with a soft, cake‑like texture.
Ingredient Substitutions
Don't have an ingredient? Try these alternatives
Will give a slightly grainier texture; blend until smooth.
Adds a faint coconut aroma and keeps the cake dairy‑free.
Recipe Variations
Try these delicious twists on the original
Spicy Version
Add a pinch of cayenne pepper or chili powder to the batter for a subtle kick.
Mediterranean Style
Swap half the Oreos for crushed biscotti and drizzle with honey before serving.
Common Mistakes to Avoid
Learn from others' mistakes for perfect results
- Over‑mixing the batter, which makes the texture dense.
- Baking too long, causing a dry top.
- Using cold butter, which prevents the crust from forming properly.
Meal Prep & Storage
Make Ahead Tips
You can crumble the cookies and melt the butter a day ahead; keep them covered in the fridge and assemble when ready to bake.
Leftover Ideas
Reheat gently in a skillet over low heat, covered, to restore the soft interior without drying out.
Perfect Pairings
Serve this with...
Cooking Timeline
Preheat oven and prepare baking dish; crush cookies.
Melt butter and drizzle over cookie base.
Mix cream cheese, sugar, and vanilla until smooth.
Bake the assembled cake; let it rest briefly before serving.
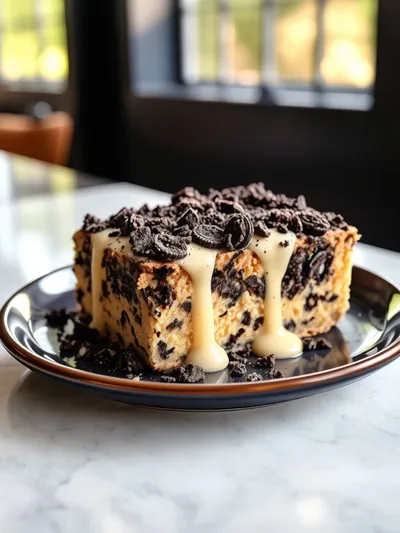
Oreo Dump Cake – 5 Ingredient Quick Dessert
A buttery, gooey Oreo Dump Cake that comes together with just five pantry staples, perfect for a sweet craving when time is short.
Timing
Prep Time
10 Minutes
Cook Time
30 Minutes
Total Time
40 Minutes
Recipe Details
Ingredients
Main Ingredients
- 01 15 full‑size Oreo cookies, crushed
- 02 1/2 cup unsalted butter, melted
- 03 8 oz cream cheese, softened
- 04 1/2 cup granulated sugar
- 05 1 tsp vanilla extract
For Serving
- 01 Whipped topping or vanilla ice cream (optional)
Instructions
Preheat the oven to 350°F (175°C). Lightly grease a 9‑inch square baking dish.
Spread the crushed Oreos evenly across the bottom of the dish, then drizzle the melted butter over them, letting it soak into the crumbs.
In a mixing bowl, combine softened cream cheese, sugar, and vanilla extract until smooth; no need to over‑mix.
Pour the cream cheese mixture over the cookie layer, spreading gently to cover.
Bake for 30 minutes, or until the top is lightly golden and the center is set but still slightly jiggle‑y. Let cool 5 minutes, then serve warm with whipped topping.
Notes & Tips
- 1 If you prefer a richer flavor, add a tablespoon of cocoa powder to the batter.
- 2 For a crunchier top, sprinkle additional crushed Oreos before baking.
- 3 The cake can be made ahead; just reheat before serving for best texture.
Tools You'll Need
-
9‑inch square baking dish
-
Mixing bowl
-
Hand mixer or whisk
-
Spatula
-
Measuring cups and spoons
Must-Know Tips
- Don't over‑mix the batter; it keeps the crumb tender.
- Allow the butter to melt, not scorch, for a smooth base.
- Taste the batter before baking to adjust sweetness if needed.
Professional Secrets
- Room‑temperature cream cheese blends evenly, preventing lumps.
- Melted butter creates a glossy crust that caramelizes nicely.
- Baking on the middle rack ensures even heat distribution.

Recipe by
AmeliaAmelia is a seasoned food blogger and recipe creator at CookDishWorld, where she blends culinary expertise with an unwavering love for sharing delicio ...
Get Delicious Recipes Weekly
Join 25,000+ home cooks getting our best recipes straight to their inbox.
Free forever • No spam • Unsubscribe anytime