Why You'll Love It
- - No oven needed, true summer comfort
- - Minimal ingredients, pantry‑friendly
- - Creamy peanut butter flavor that feels indulgent
- - Easy to personalize with toppings
“The texture was just perfect—smooth, creamy, and the crust crumbled just right. My guests asked for seconds!”
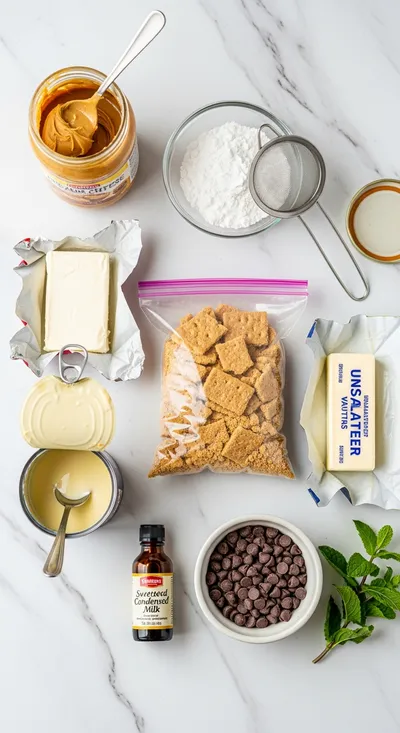
Essential Ingredient Guide
- Peanut butter: Choose a creamy, unsweetened variety for a balanced flavor; it forms the heart of the filling.
- Graham crackers: Crushed finely to create a buttery crust; you can substitute with chocolate wafers for extra depth.
- Cream cheese: Provides the silky texture and mild tang that lifts the richness.
- Powdered sugar: Sweetens the filling without altering the smooth consistency.
- Lemon juice: A splash brightens the flavor and helps stabilize the filling.
- Chocolate shavings: Adds a decorative finish and a subtle bitter contrast.
Complete Cooking Process
-
Ingredient Readiness:
Gather all components, crush the crackers, soften the cream cheese, and measure the peanut butter before you start.
-
Flavor Development:
Blend the peanut butter with cream cheese and sugar until the mixture is glossy and airy.
-
Texture Control:
Press the crushed crackers firmly into the pan to create an even base that holds its shape.
-
Finishing Touches:
Spread the filling, chill, then garnish with chocolate shavings and a drizzle of melted chocolate.
-
Serving Timing:
Let the pie sit at room temperature for a few minutes before slicing so the flavors soften.
- Use room‑temperature cream cheese for a smoother blend.
- Tap the crust pan gently to settle the crumbs evenly.
- Add a pinch of sea salt to enhance the peanut butter taste.
Pro Tips
I’ve found that a little patience while the pie sets makes all the difference. The crust becomes firm yet tender, and the filling holds its shape beautifully. So, give it at least two hours in the refrigerator, then enjoy a slice while the aroma of peanut butter lingers in the air.
The essence of the dish:
A fun fact or historical angle:
Flavor or sensory focus:
You Must Know
- Keep the crust chilled until serving.
- Do not over‑whip the filling; it should stay glossy.
- Add toppings just before serving for texture.
Frequently Asked Questions
→ Can I make this pie gluten‑free?
Yes, substitute the graham crackers with gluten‑free oat crackers or almond flour crumbs.
→ How long can I store it?
Keep the chilled pie covered for up to three days; the flavors only improve.
→ What toppings work best?
Try chopped peanuts, caramel drizzle, or fresh berries for a bright contrast.
→ Is there a vegan version?
Swap cream cheese for a vegan cream cheese and use a plant‑based peanut butter; the texture stays creamy.
→ Can I add chocolate layers?
Sure! Melt dark chocolate and swirl it into the filling before chilling.
→ Do I need a springform pan?
A simple 9‑inch pie dish works fine; just press the crust firmly.
Chef's Tips
Make sure the butter is fully melted before mixing with crumbs; otherwise the crust may be grainy.,If the filling looks too thick, add a splash more heavy cream.,For a richer chocolate flavor, fold in a tablespoon of cocoa powder with the filling.
Nutrition Facts
per serving
420
Calories
9g
Protein
32g
Carbs
28g
Fat
Taste Profile
Rich, creamy, and subtly sweet with a nutty depth
Ingredient Substitutions
Don't have an ingredient? Try these alternatives
Will reduce richness slightly; add a touch more peanut butter to maintain creaminess.
Provides a similar crumb texture with a malted flavor.
Recipe Variations
Try these delicious twists on the original
Chocolate Swirl
Add 2 tbsp melted dark chocolate to the filling and swirl for a marbled effect.
Banana Boost
Layer thin banana slices over the crust before adding the filling for extra fruitiness.
Common Mistakes to Avoid
Learn from others' mistakes for perfect results
- Over‑mixing the filling, which can make it dense.
- Skipping the chill time, leading to a loose texture.
- Using too much butter in the crust, causing sogginess.
Meal Prep & Storage
Make Ahead Tips
Prepare the crust and filling a day ahead; keep the pie covered in the fridge and add toppings just before serving.
Leftover Ideas
Refrigerate leftovers for up to two days; enjoy chilled or let sit briefly at room temperature.
Perfect Pairings
Serve this with...
Cooking Timeline
Crush crackers, melt butter, and press crust into pan.
Beat cream cheese, then blend in peanut butter, sugar, and flavorings.
Spread the filling over the crust, smooth top.
Cover and chill in fridge for at least 2 hours.
Garnish with chocolate shavings and serve.
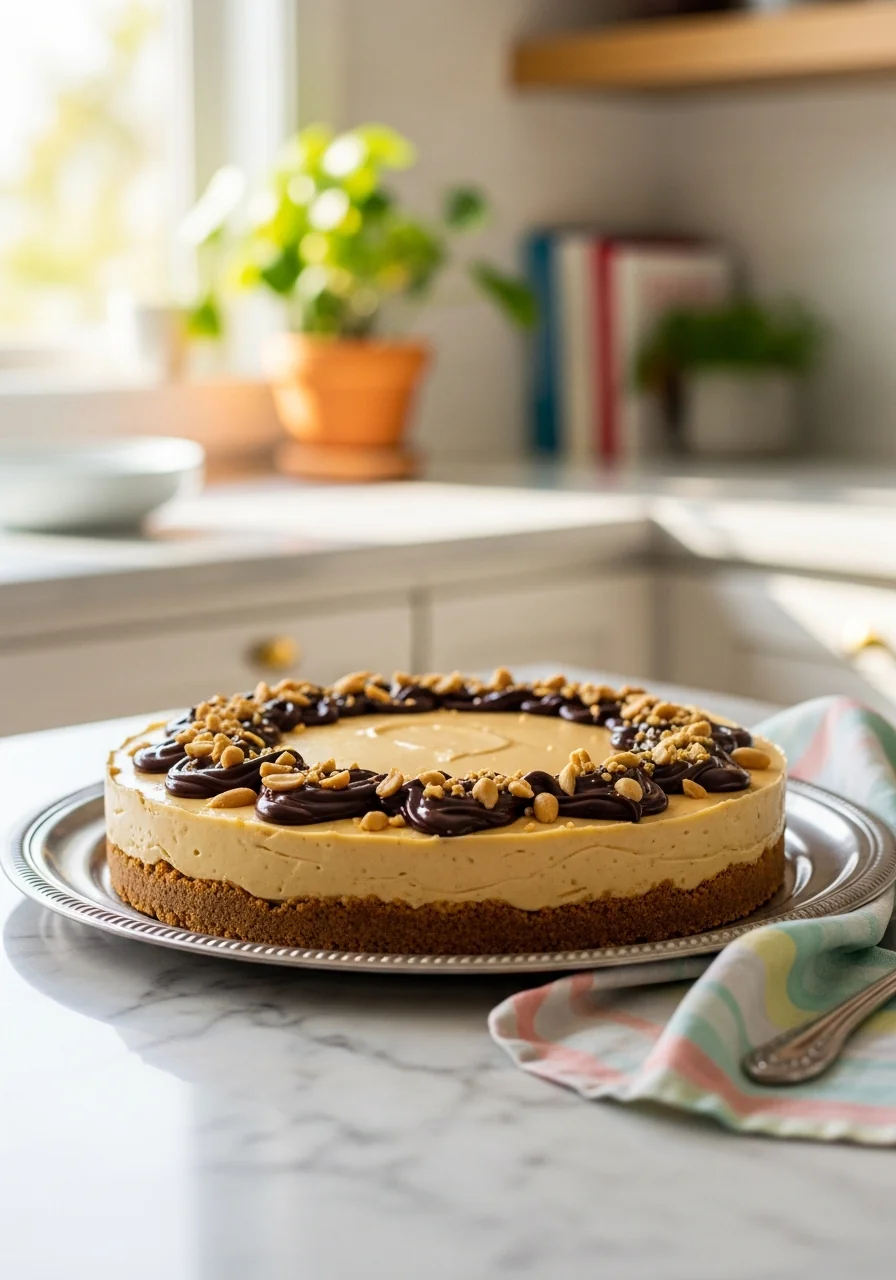
No Bake Peanut Butter Pie – Quick & Easy Dessert
Indulge in a creamy, no bake peanut butter pie that comes together in minutes—perfect for a sweet, satisfying dessert without turning on the oven. The buttery crust, silky filling, and a hint of chocolate make it a comforting treat for any gathering.
Timing
Prep Time
15 Minutes
Cook Time
0 Minutes
Total Time
2 Hours 15 Minutes
Recipe Details
Ingredients
Crust
- 01 1 1/2 cups graham cracker crumbs
- 02 5 tbsp melted butter
- 03 2 tbsp sugar
Filling
- 01 8 oz cream cheese, softened
- 02 1/2 cup creamy peanut butter
- 03 1/3 cup powdered sugar
- 04 1 tsp vanilla extract
- 05 2 tsp lemon juice
- 06 2 tbsp heavy cream
Topping
- 01 Chocolate shavings
- 02 Optional: chopped peanuts or drizzle of chocolate
Instructions
Combine the graham cracker crumbs, melted butter, and sugar in a bowl; press the mixture firmly into the bottom of a 9‑inch pie pan.
In a large mixing bowl, beat the softened cream cheese until smooth; add the peanut butter, powdered sugar, vanilla, lemon juice, and heavy cream, and whisk until the filling is glossy.
Spread the filling evenly over the prepared crust, smoothing the top with a spatula.
Refrigerate the pie for at least 2 hours, or until set.
Before serving, garnish with chocolate shavings and, if desired, a drizzle of melted chocolate or a sprinkle of chopped peanuts.
Notes & Tips
- 1 Make sure the butter is fully melted before mixing with crumbs; otherwise the crust may be grainy.
- 2 If the filling looks too thick, add a splash more heavy cream.
- 3 For a richer chocolate flavor, fold in a tablespoon of cocoa powder with the filling.
Tools You'll Need
-
9‑inch pie dish
-
Mixing bowls
-
Hand mixer or whisk
-
Food processor (optional for crumbs)
-
Spatula
Must-Know Tips
- Do not over‑whisk the filling; keep it light and airy.
- Press the crust evenly to avoid cracks.
- Taste the filling before chilling; adjust sweetness if needed.
Professional Secrets
- Room temperature cream cheese blends without lumps, ensuring a silky texture.
- A brief chill after pressing the crust firms it quickly.
- A dash of lemon juice balances the richness of peanut butter.

Recipe by
AmeliaAmelia is a seasoned food blogger and recipe creator at CookDishWorld, where she blends culinary expertise with an unwavering love for sharing delicio ...
Get Delicious Recipes Weekly
Join 25,000+ home cooks getting our best recipes straight to their inbox.
Free forever • No spam • Unsubscribe anytime